














































 Home
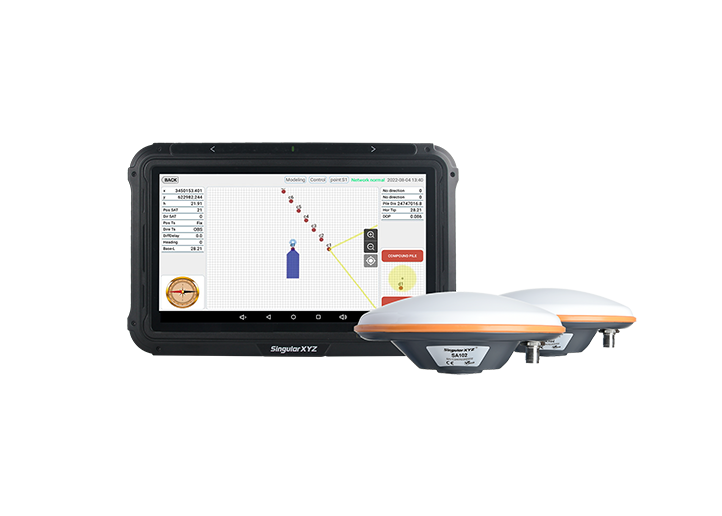
SingularPad Field Surveying Software
learn more




 2026-11-17
 Linden


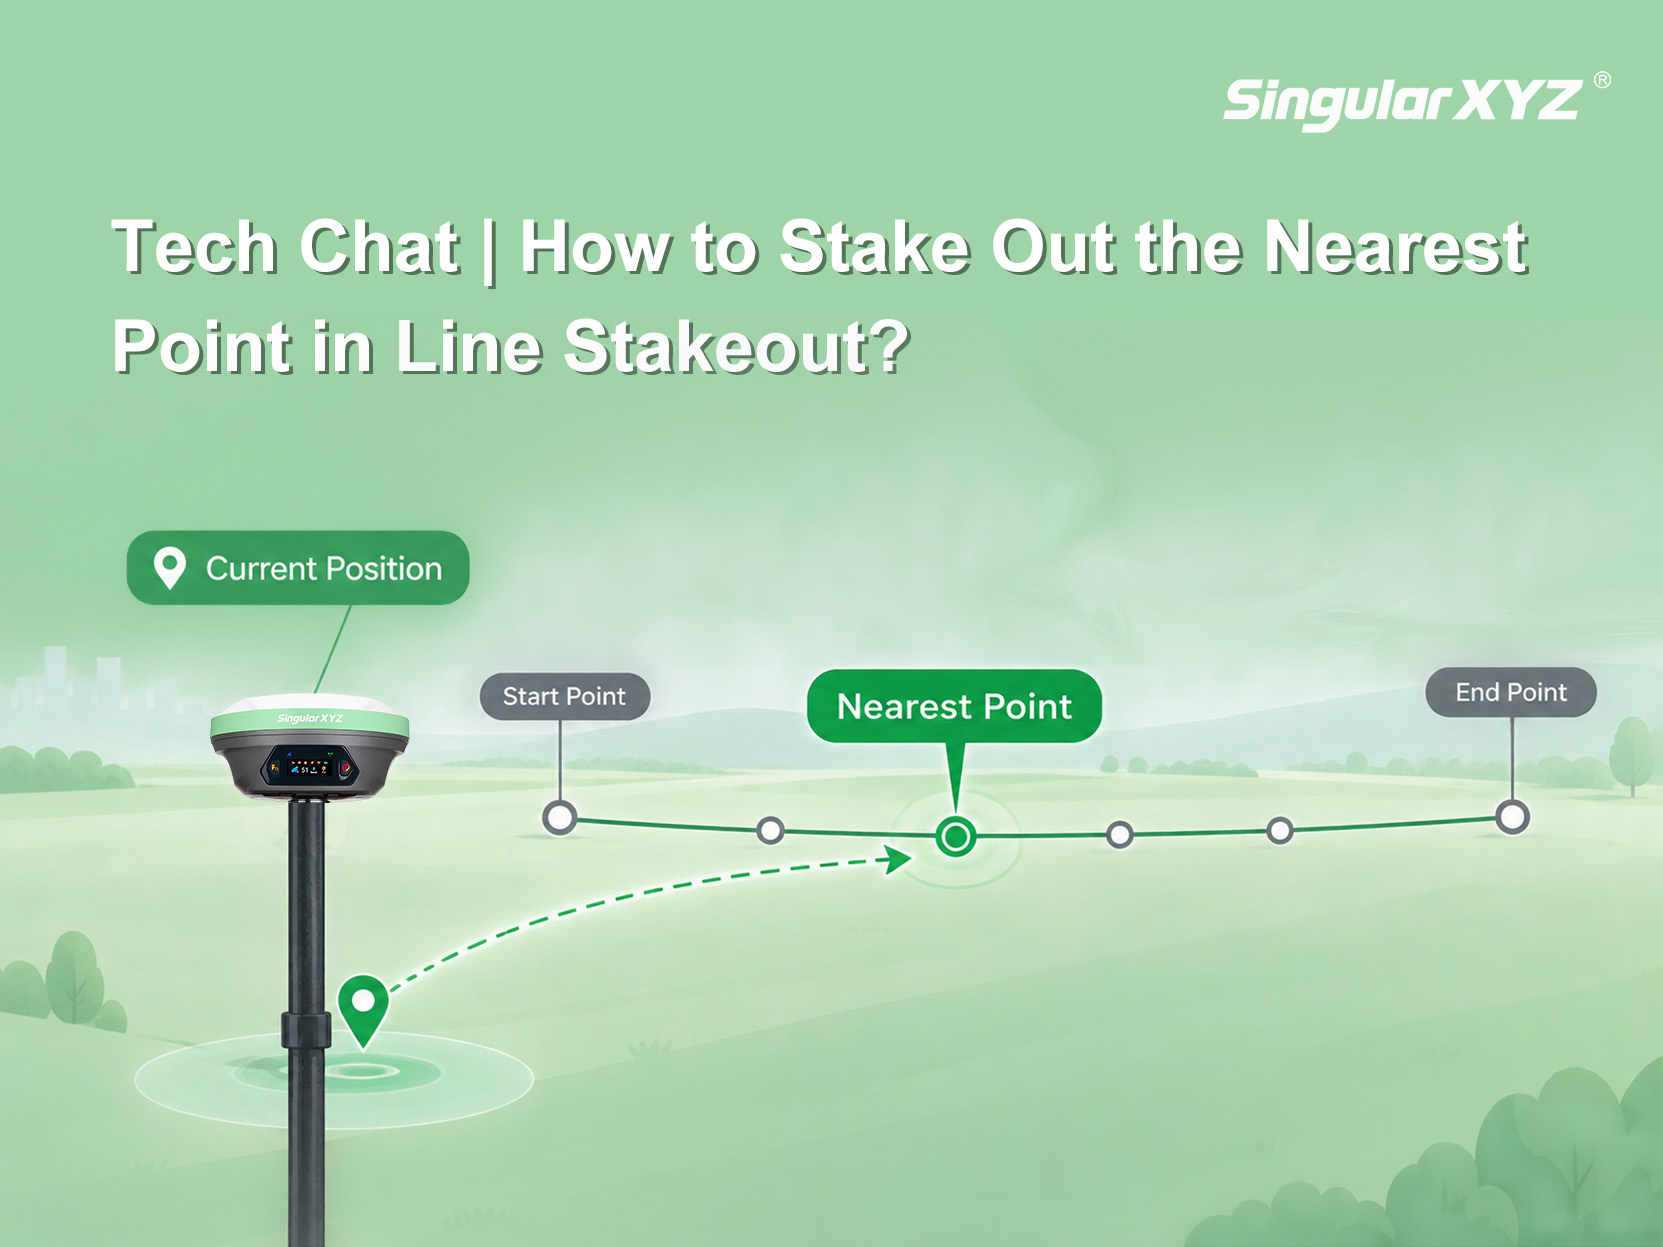
In line stakeout, whether you select a line directly in Line Stakeout or pick one from a CAD file, the same situation comes up: your current position is not at the start or end of the line to be staked out. Following the default order from the starting point would mean walking all the way back first — an unnecessary trip.
To address this, the stakeout settings provide an Auto Stake Out Nearest Point option: once enabled, the software automatically takes the point on the line closest to the receiver's current position as the stakeout target, saving the trip back to the start end.
Whenever your working position is not at the start end of the target line, this feature comes in handy:
Long lines: for pipelines and similar long alignments, starting from the nearest point saves time compared with returning to the start end;
Taking over mid-task or re-measuring points: when a task changes hands, resumes after an interruption, or specific points need to be re-measured;
Starting from anywhere on site: crews often enter from the most convenient access point, and starting from the nearest point simply flows better.
By default, line stakeout proceeds sequentially along the line, starting from its start end. Auto Stake Out Nearest Point changes only "where to start": the software first generates the stakeout points on the line based on the chainage settings, then selects the one nearest to the receiver's current position as the first stakeout target.
Before you start, confirm the target line and the stakeout method in use. For details on line stakeout itself, please refer to our previously published blog posts.
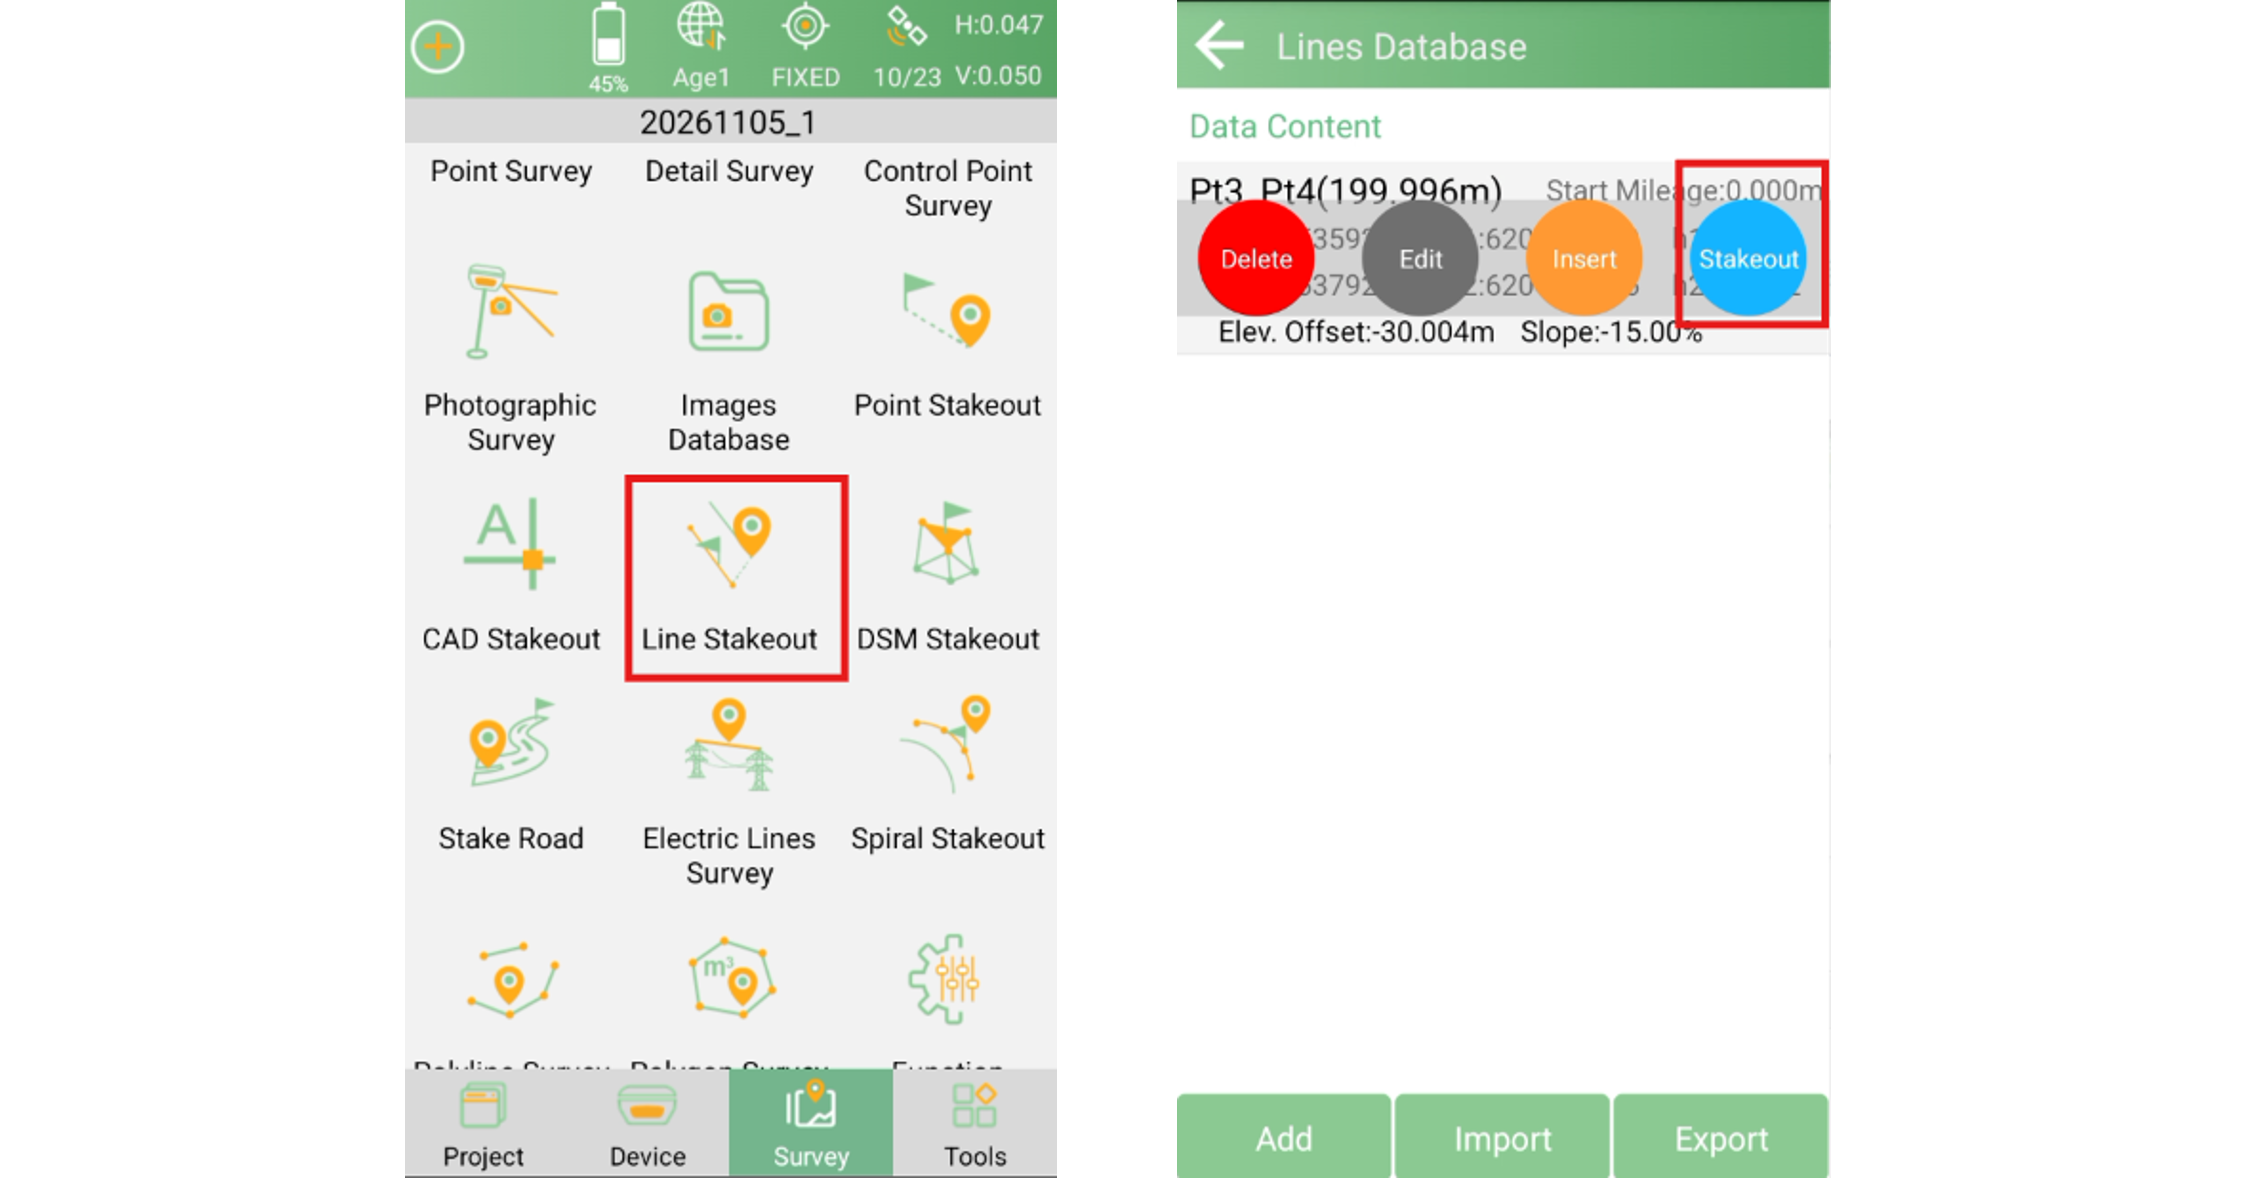
Select the line to be staked out and tap Stakeout to open the stakeout settings page. This step determines which line all subsequent stakeout parameters apply to.
Tap the button to enable Stake by Pile-to-Pile Coordinates, then set the Calculation Mode and Interval. This step comes first because the stakeout points on the line are generated by the chainage settings — only after these points exist can the software pick the nearest one.
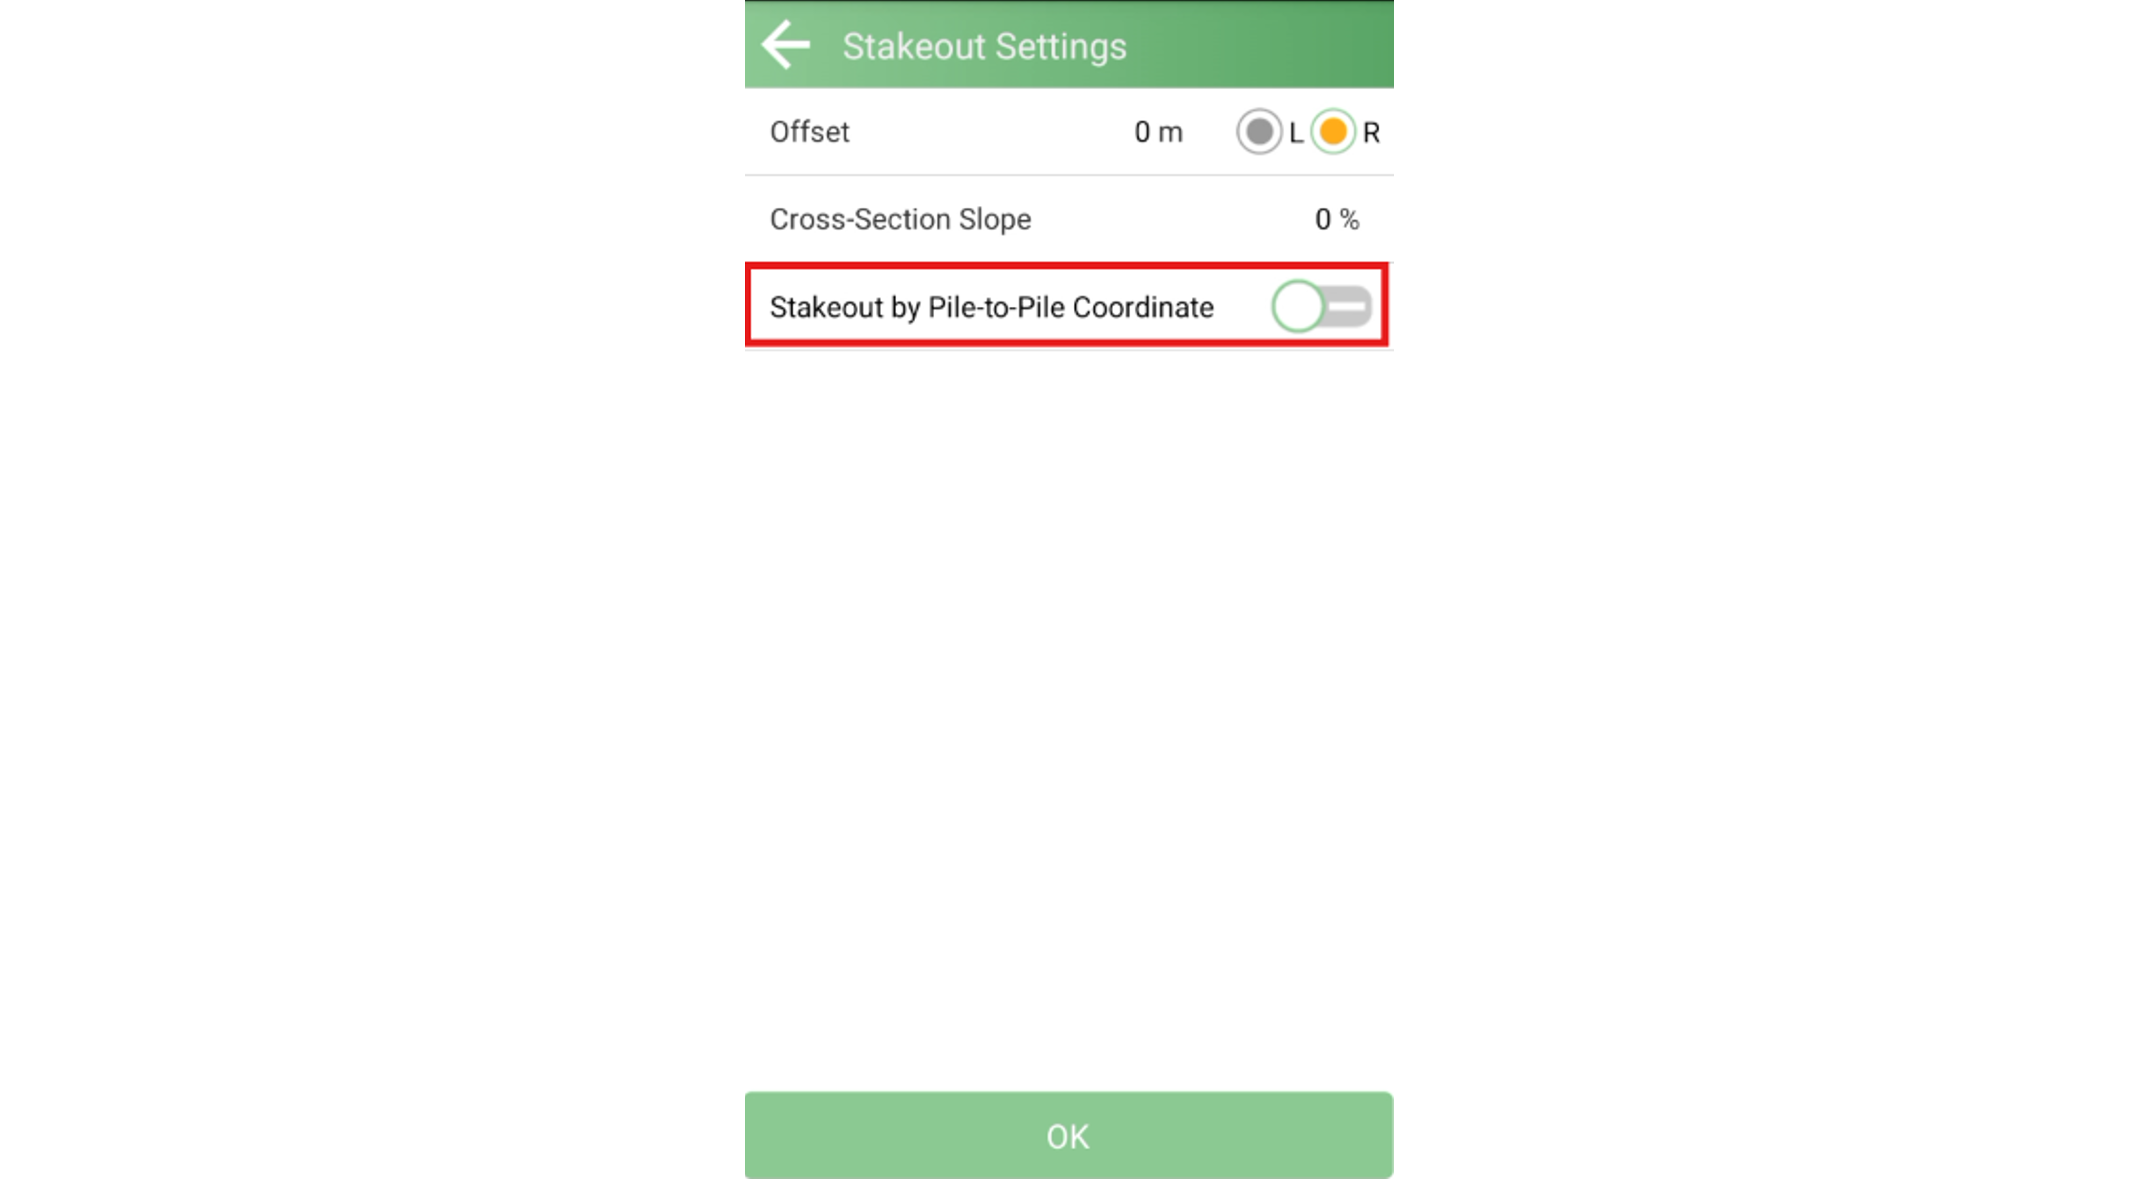
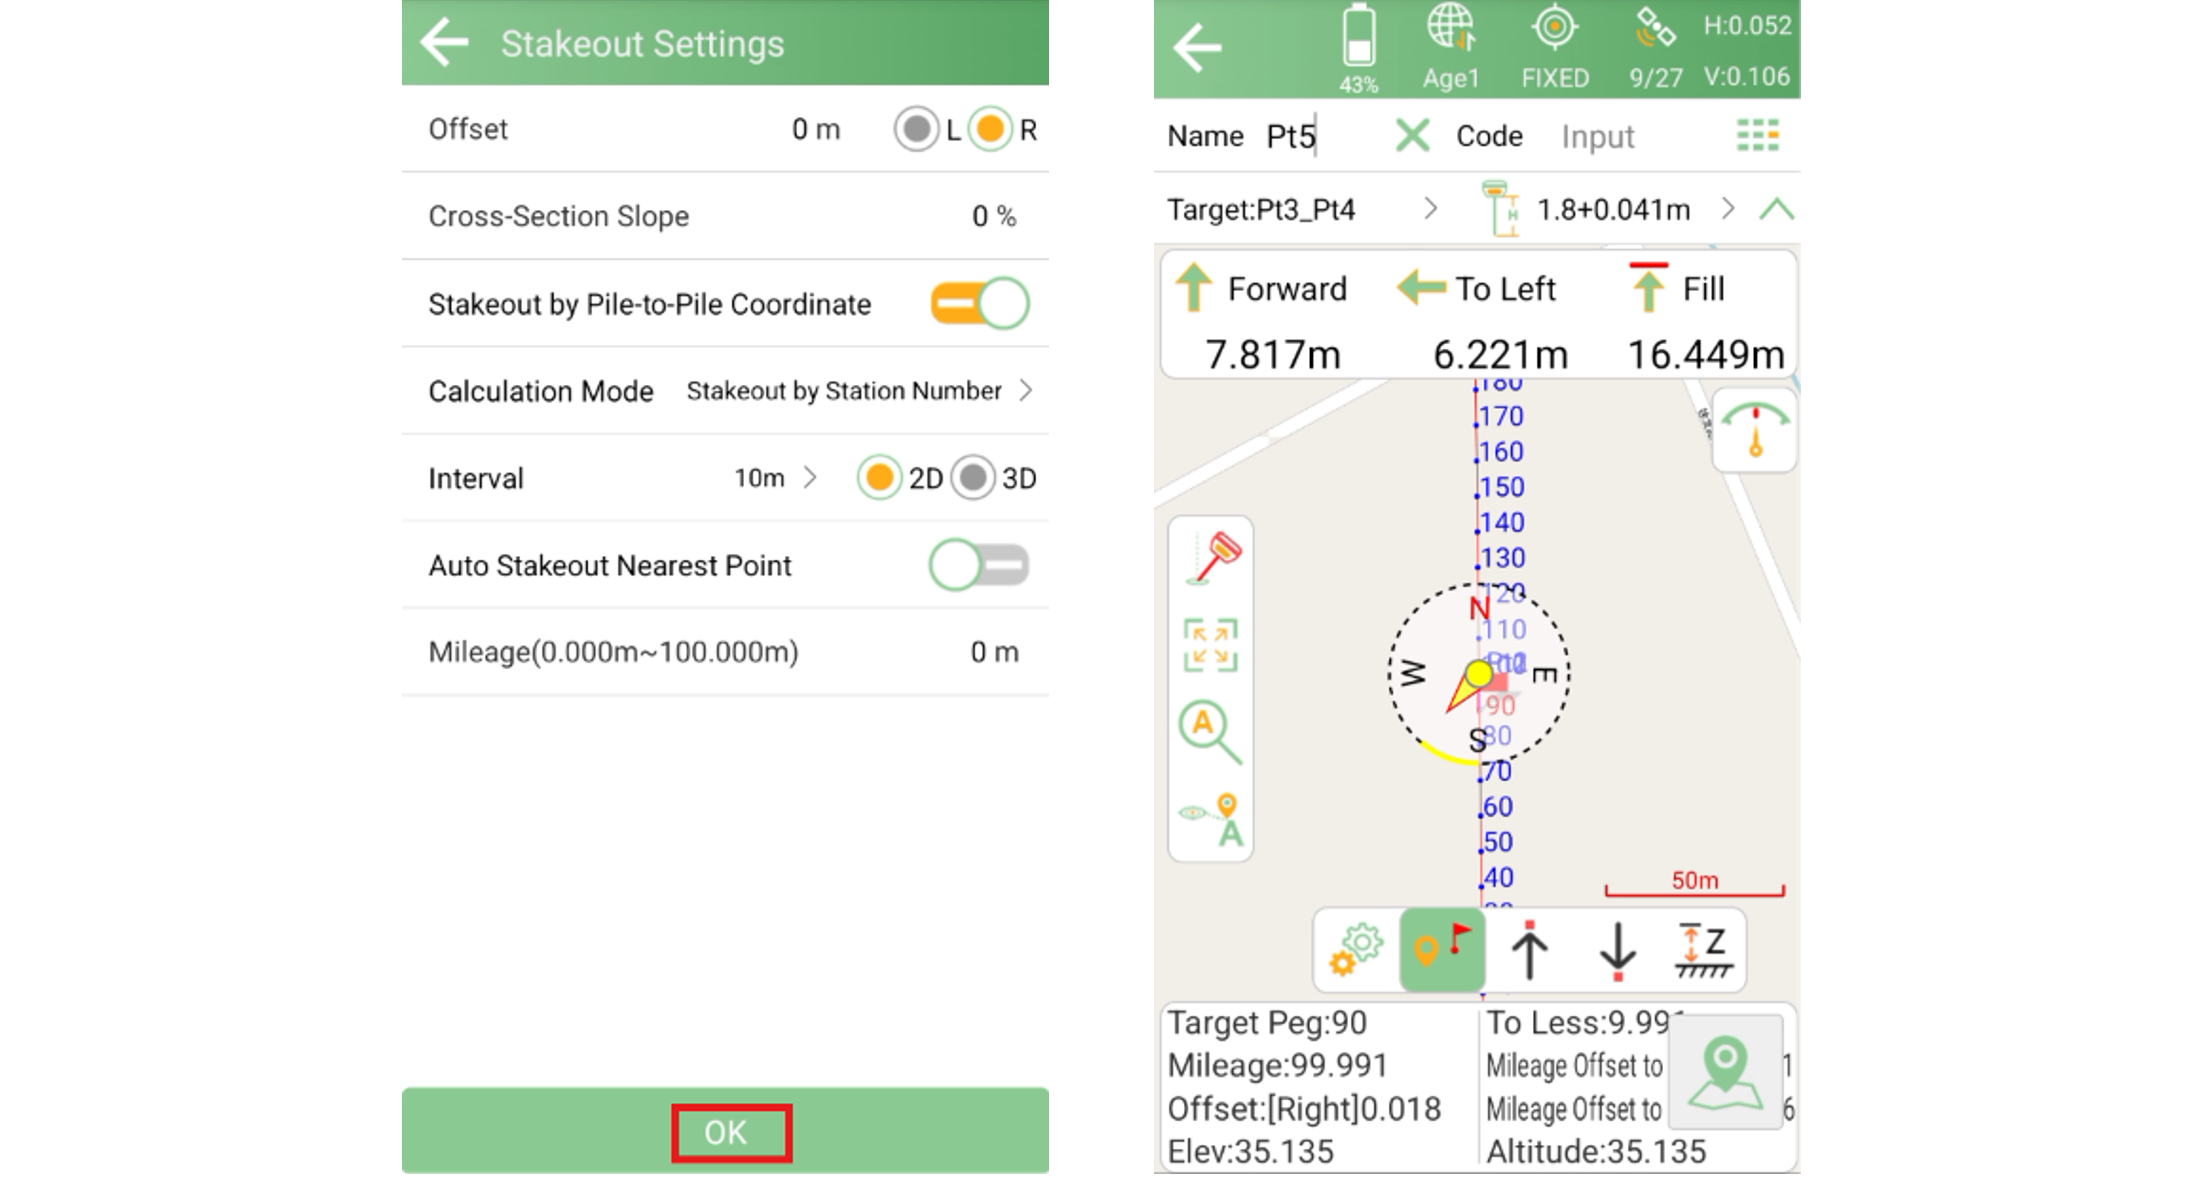
Tap to enable Auto Stakeout Nearest Point, then tap OK to finish.
On the stakeout page, the software automatically stakes out the point on the line segment nearest to the receiver's current position. Once that point is staked out, tap the Switch icon to continue with the next one.
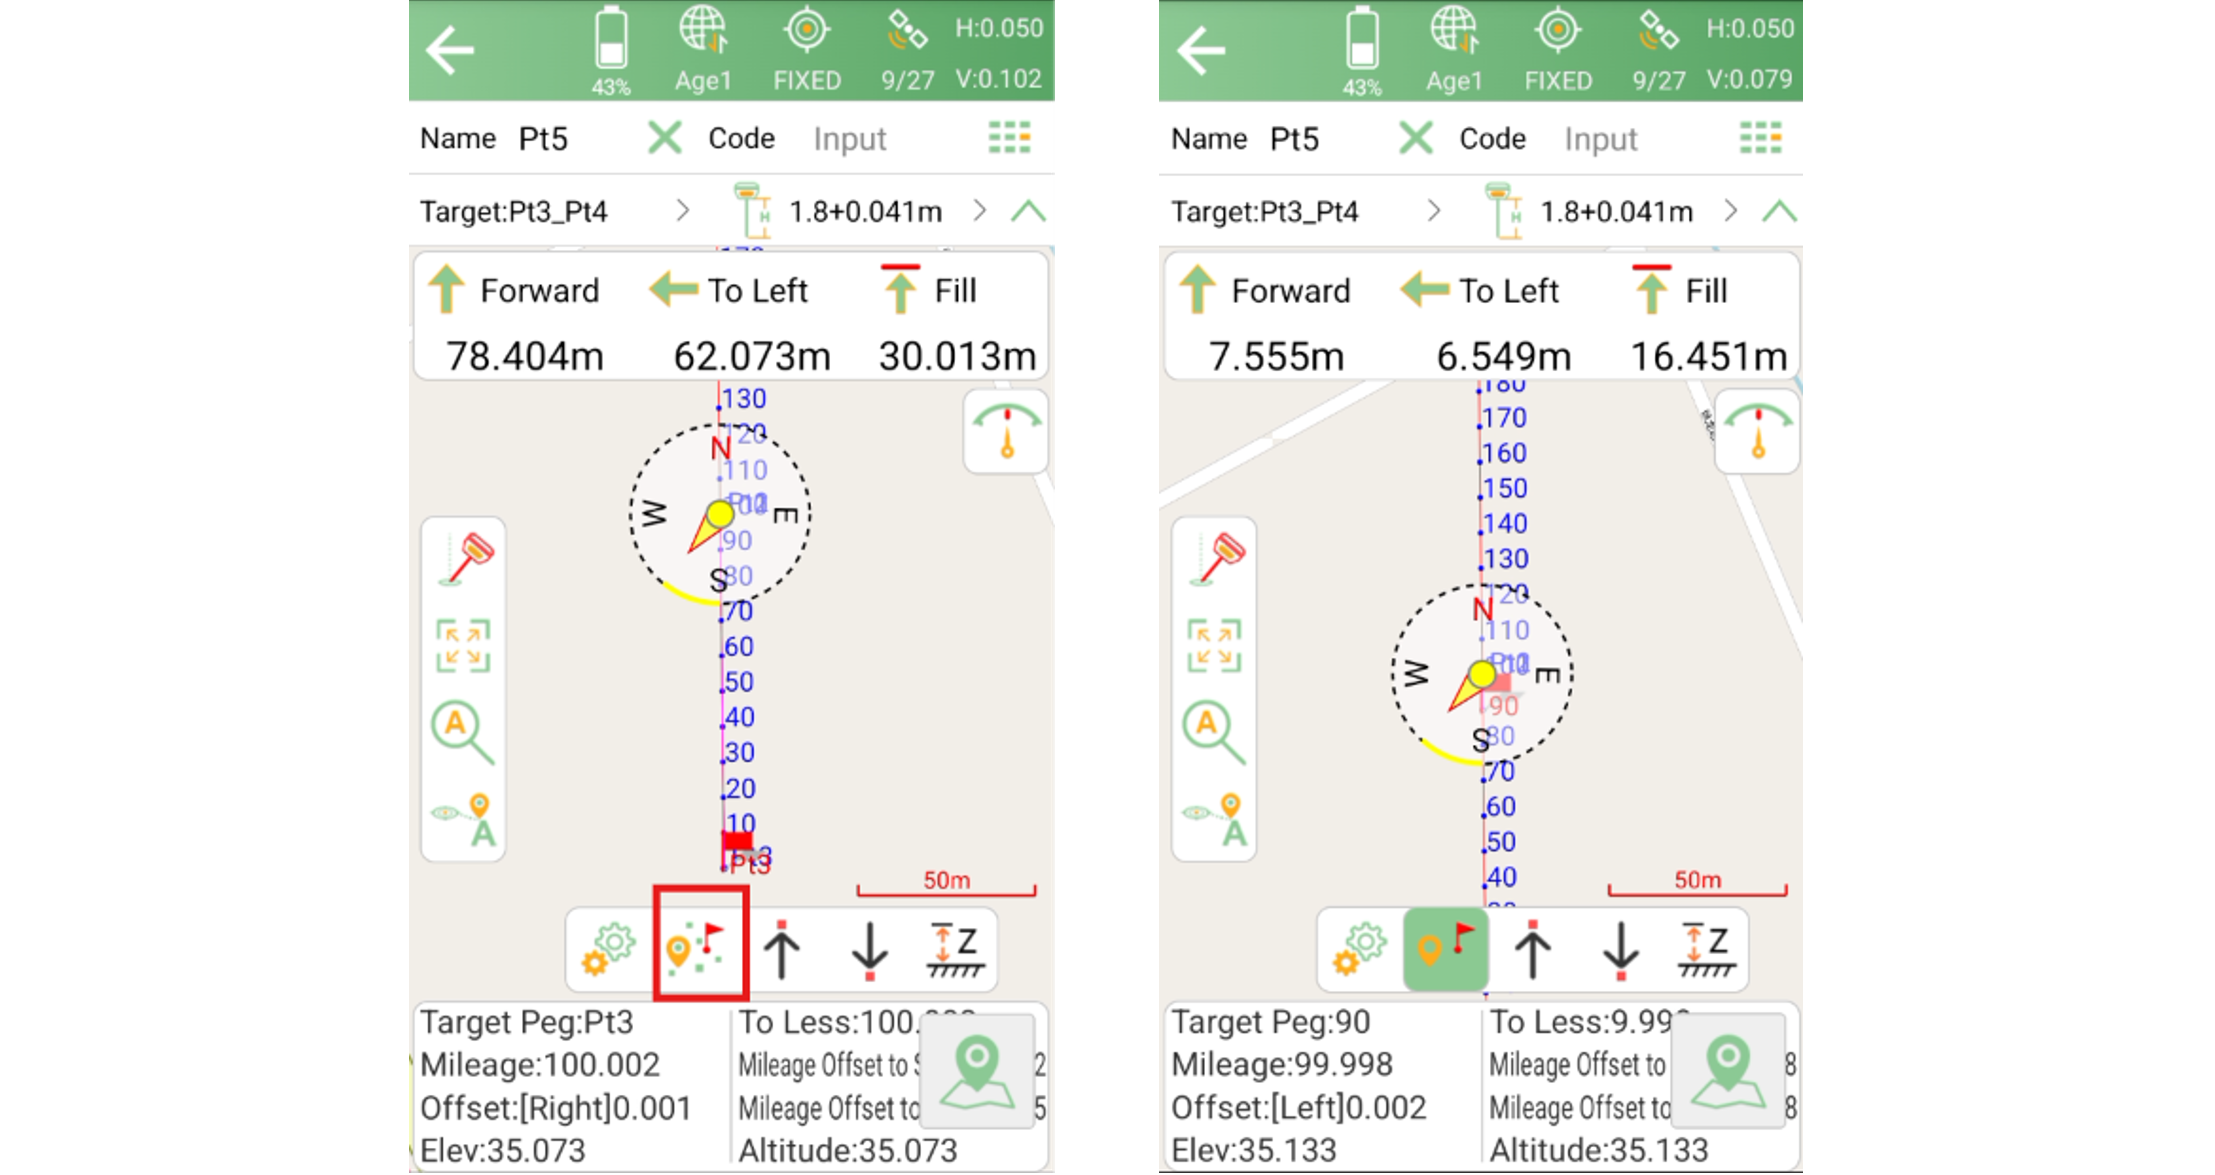
If you did not enable this option in the stakeout settings and are already mid-task, you can tap the corresponding button on the stakeout page to stake out the nearest point directly — no need to exit and reconfigure.
Confirm the line and method first: before using the nearest-point feature, confirm the target line and stakeout method to avoid staking out on the wrong line.
No need to enable it near the start end: if you are already near the start end of the line, just stake out in sequence — no extra setting required.
Switch anytime mid-task: forgetting to enable it in the settings does not affect your work — you can still jump to the nearest point with the button on the stakeout page.
Re-check settings if the nearest point is unexpected: if the automatically selected point differs from what you expect, go back to the stakeout settings and check whether the Calculation Method and Interval are set properly.
Stake Out Nearest Point solves a very concrete problem: it makes the stakeout order follow the operator, instead of making the operator follow the stakeout order. For long lines, mid-task handovers, and starting work from the nearest access point, it saves considerable walking time. You can enable it in advance during setup, or switch on demand mid-task — the two methods work well together.
If you would like to use this feature in SingularPad, or encounter any issues during configuration or use, please contact our support team to get assistance.